Have you been waiting for that letter from Hogwarts to invite you to become a wizard? Then you are in the right place! In this blog post I will guide you through detailed steps of becoming a magician and learning how to develop your first prototypes for HoloLens. HoloLens is a holographic computer through which you can see the real world and modify it with the power of code.

Part 0. Installation Chapter
What do you need to install to start developing prototypes for HoloLens?
- Unity 5.5
- Visual Studio 2015 Update 3
- Choose a custom install, ensure that Tools (1.4) and Windows 10 SDK (10.0.10586) is enabled under Universal Windows App Development Tools node.
- HoloLens Emulator
For more details on how to install the tools, please consult Microsoft HoloLens page.
Part 1. Hello, Holocube!
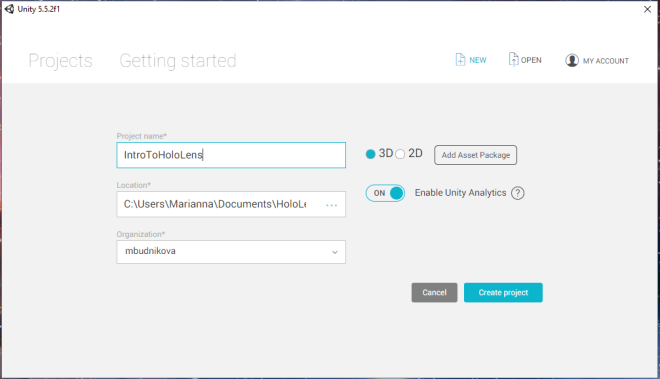
Once your tools are installed, we are ready to create a Unity project for the HoloLens application!
- Launch Unity.
- Create a new project.
- Click on New to create a new Unity project.
- Select 3D and name the project IntroToHoloLens.
- Click on Create project button.
- Add HoloToolkit to the project.
- Download HoloToolkit-Unity Asset Package (I have unity 5.5.2f1 installed, so I downloaded HoloToolkit-Unity for Unity 5.5.2f1+).
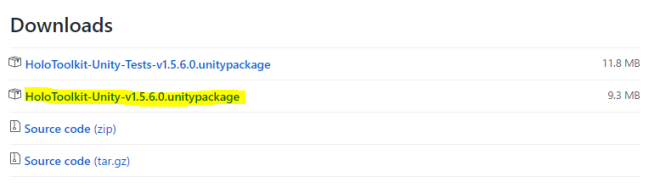
- Import HoloToolkit package into your project: Assets->Import Package -> Custom Package.
- Select the HoloToolkit asset package you just downloaded and click on Import.
- You should now have a HoloToolkit menu item in Unity.
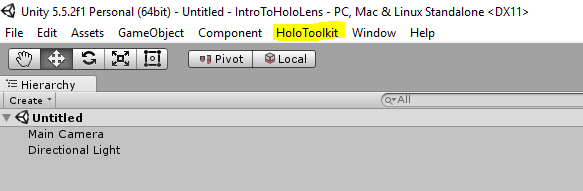
- Set up Project settings for your HoloLens project (it may prompt you to restart Unity, do so): HoloToolkit -> Configure -> Apply HoloLens Project Settings.
- Set up scene settings for your HoloLens project: HoloToolkit -> Configure -> Apply HoloLens Scene Settings.
- Download HoloToolkit-Unity Asset Package (I have unity 5.5.2f1 installed, so I downloaded HoloToolkit-Unity for Unity 5.5.2f1+).
- Setup your first scene.
- Create a new Scene: File -> New Scene.
- Remove the default Main Camera and Directional Light objects.
- Add the HoloLensCamera.prefab (found under HoloToolkit/Input/Prefabs).
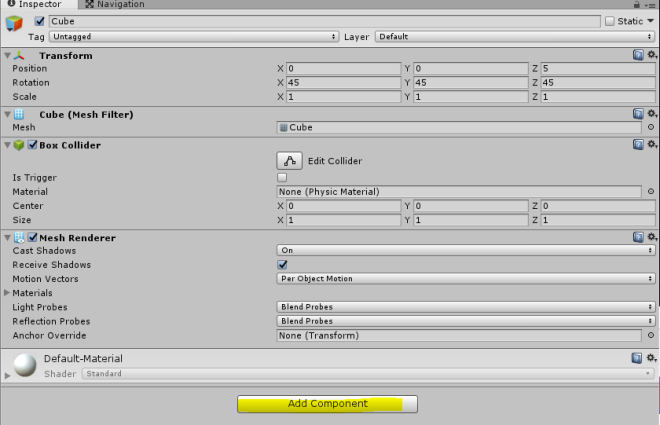
- Add a Cube object to the scene: Create->3D Object -> Cube.
- Set the position of the Cube to (0, 0, 5) and rotation to (45, 45, 45).

- Build.
- Open Build settings: Build -> Build Settings…
- Click on Add Open Scenes.
- Click on Windows Store.
- Click on Switch Platform.
- Enable Unity C# projects.
- Click on Build.
- Create a new folder, name it App and click on Select Folder.

- Deploy.
- Once the build completes, you should see a new explorer window pop up. Go to App folder you created in the previous step, and double click on IntroToHoloLens.sln. We can now deploy the application to HoloLens emulator!
- In Visual Studio, switch Debug to Release, ARM to x86 and Local Machine to HoloLens Emulator.

- To start the emulator, click on Debug- -> Start Without Debugging
- Enjoy.
- When the emulator launches and your projects gets deployed, you will see your first hologram. Hello, Cube!
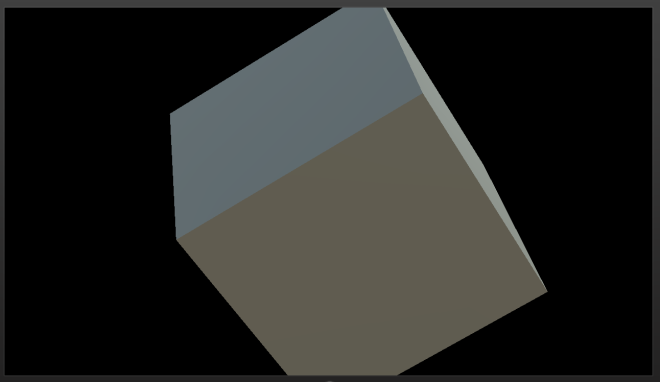
- When the emulator launches and your projects gets deployed, you will see your first hologram. Hello, Cube!
Part 2. Your Input matters – even in the emulator!
- Add the Cursor.prefab (found under HoloToolkit/Input/Prefabs/Cursor).
- Create an empty object in your scene. Rename it ‘Managers’.
- Add the InputManager.prefab (found under HoloToolkit/Input/Prefabs) as a child to your new ‘Managers’ Object.
- Let’s add the functionality to move the Cube using the power of HoloLens Tap gesture!
- Click on the Cube in the Heirarchy list, and look in the Inspector panel for a conspicuously named button named ‘Add Component’.
- Type ‘GuitarInputManager’ to create a new C# script that will handle interaction with the Cube.
- Open the script in Visual Studio and replace it with the following code:
- Click on the Cube in the Heirarchy list, and look in the Inspector panel for a conspicuously named button named ‘Add Component’.
-
using HoloToolkit.Unity.InputModule; using UnityEngine; public class GuitarInputManager : MonoBehaviour, IInputClickHandler { public virtual void OnInputClicked(InputClickedEventData eventData) { Debug.Log("Input clicked"); } } - Since we are deploying to an emulator, and not a real device, we will not be able to see the environment surrounding us. However, we can emulate the room using the emulator’s pre-uploaded room scans and visualize them via mesh drawing.
- To enable spatial mapping in your scene, add the SpatialMapping.prefab (found under HoloToolkit/SpatialMapping/Prefabs) to your ‘Managers’ object.
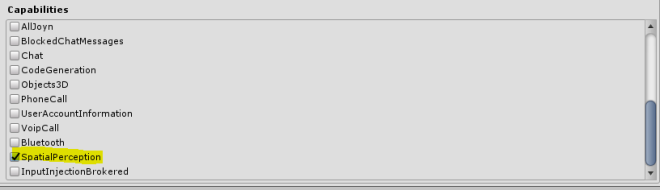
- Enable Spatial PerceptionCapabilities: Edit/Project Settings/Player -> Inspector -> Publishing Settings/Capabilities.
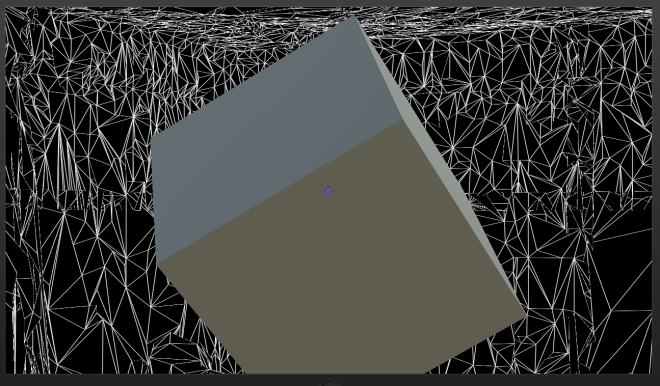
- Finally, let’s build and deploy the application to emulator following steps 6-7 in Part I! In the emulator you will see the cube surrounded by surreal looking triangles, the spatially mapped room. You can click on the cube using a right mouse button to simulate the air tap gesture, and in the Debug window of Visual Studio you should see the “Input Clicked” text printed out.
Part 2. Where is my guitar asset?
At this point you are probably wondering. “Wait, you promised there would be a guitar and music playing and we will have a wizard party with martinis.” And you are right, I did promise some of those things. Let’s implement them!
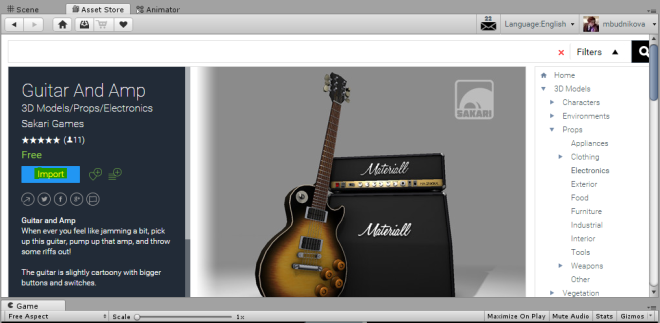
- Find the guitar asset in the Unity Asset Store and import it into the project (uncheck the Scenes folder when importing, since we already have a cool scene in our project). Note that to download an asset from the Unity Asset Store into your project, you have to have a Unity account.
- It’s time to replace the boring cube with a cool guitar.
- Delete the cube object, and drag the Guitar.prefab (found under Assets\Prefabs) into the Heirarchy panel.
- Set guitar Position to (0, 0, 5) and Scale to (0.5, 0.5, 0.5). Leave the rest to default.
- With Guitar selected, add GuitarInputManager component to Guitar.
- Add Mesh Collider component to Guitar.
- You can test deploy the app once again to make sure that the guitar shows up correctly, is tappable, and that the ‘Input clicked’ message is displayed in the debug window.
- The Input Clicked message is not the most exciting or realistic feature a guitar can have, so let’s add something cooler and more useful. For this tutorial, when the Guitar object is tapped, information about a band will be shown and giving the user an option to play a music sample for the band. Off we go! Let’s add the band info panel.
- In the Hierarchy panel, click on Create->UI->Text. This will create a Canvas object with a Text object as its child as well as the EventSystem object to handle UI events.
- Change the Canvas object to map to World Space, and have 10 Dynamic Pixels Per Unit to make sure the text is displayed with higher resolution.
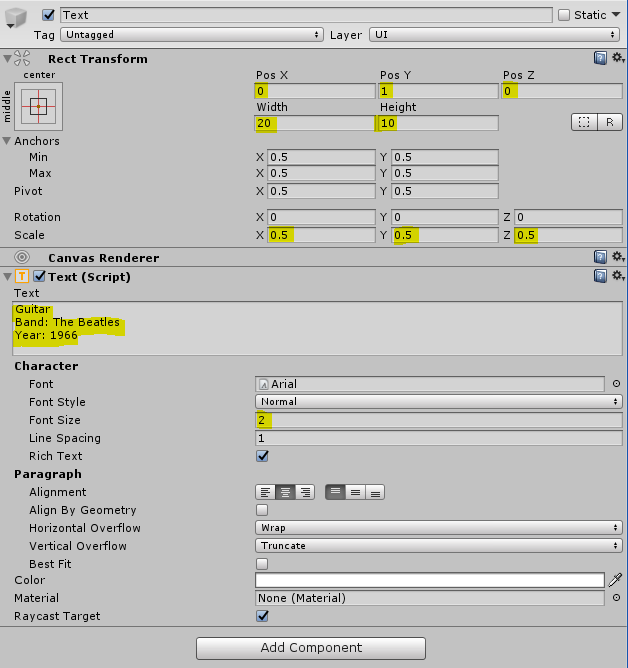
- Change Canvas Position, Width, Height and Scale properties to match that of the image below.

- Change Text Position, Width, Height, Scale, Text and Font Size properties to match that of the image below.
- The last UI component we need to add is a button that will allow us to play the music sample for the band. Right click on the Canvas object, and select UI -> Button to add the button.
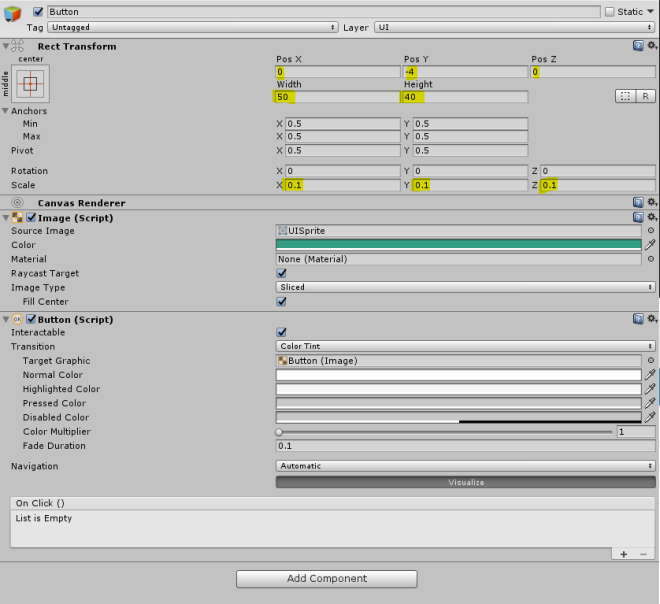
- Change the button Position, Width, Height, Scale and Color settings to match that of the image below.
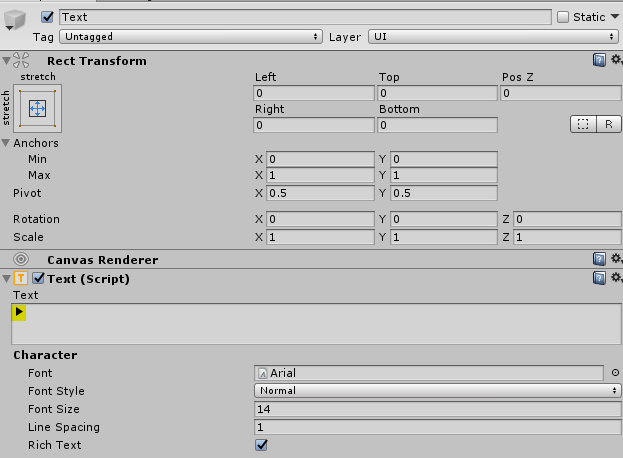
- If you expand the button object and click on the Text object, set the button test to a little cute Play triangle character ▶.

- Build and deploy to see a Guitar and band info billboard appear in your virtual room! Clicking the buttons will not do anything right now. We will add that functionality in the next steps.

Part 3. Time to have a wizard guitar party
Now that we have a guitar and a UI menu for playing music samples, it is time to wire up the code to display the menu when the guitar is tapped and play a music sample when the Play button is pressed.
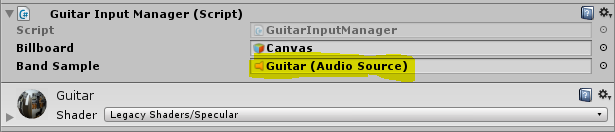
- Modify the code for Guitar Manager to add Billboard game object, AudioSource object and IsMusicPlaying flag. Add a PlaySample function to play the music when the play button is clicked. The final version of GuitarInputManager should look like this:
-
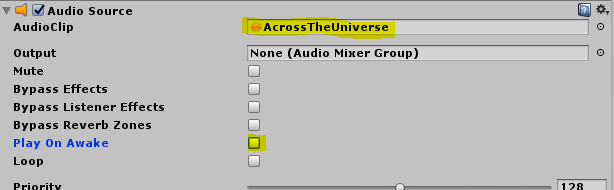
using HoloToolkit.Unity.InputModule; using UnityEngine; public class GuitarInputManager : MonoBehaviour, IInputClickHandler { public GameObject billboard; public AudioSource BandSample; private bool IsMusicPlaying; public virtual void OnInputClicked(InputClickedEventData eventData) { Debug.Log("Input clicked"); billboard.SetActive(true); } public void PlaySample() { IsMusicPlaying = !IsMusicPlaying; if (IsMusicPlaying) { BandSample.Play(); } else { BandSample.Pause(); } } } - Add a AudioSource component to Guitar and set AudioClip to Across the Universe midi music file, which can be downloaded here. Make sure to uncheck “Play on Awake”.
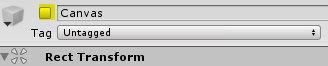
- Drag the Audio Source created in step 3 onto the GuitarInputManager’s BandSample object. Drag the Canvas object created in Part 2 onto the Billboard.
- Disable the Canvas object in the Inspector.
- Add spatial sound capability so that when we turn away from the guitar, the sound comes from the correct location, and being far away from the guitar makes the music sound quieter, just like in the real world.
- Set the MS HRTF Spatializer in your audio settings:
Edit -> Project Settings -> Audio -> Spatializer. - In Guitar Inspector settings, check the Spatialize to enable spatial sound and drag SpatialBlend slider all the way to the right for 3D sound.
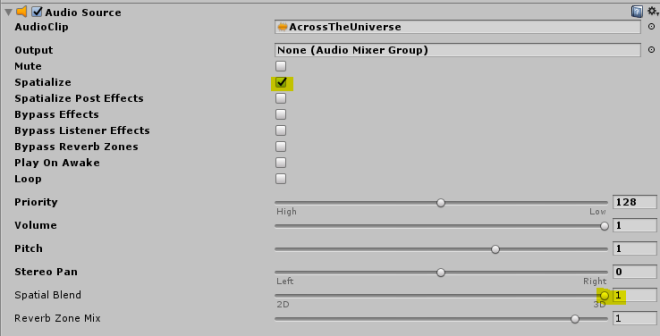
- Set the MS HRTF Spatializer in your audio settings:
- Finally, select the Button object and look at the inspector Inspector panel. Let’s map the OnClick event at the bottom of the Inspector panel to the PlaySample function we created in Part 2. Select the Guitar object, and in the function drop down choose GuitarInputManager->PlaySample.

- We are all set for the final build, deploy and enjoy! When you launch the application, the menu will be hidden. Try tapping on the guitar, and the menu will appear. Tapping on the play button will start the iconic Across the Universe trek by The Beatles.
Congratulations! You have taken the first step to becoming a HoloLens wizard and filling this world with holograms.